- Sign In
- Create Account
Dream It, Plan It, Do It!
Not a Member? Join- Don't have an account? Sign Up
- Already a member? Sign In
Step 1. Deleting The Cube - Click on the cube to outline it in orange, then right click it and select Delete. |
Step 2. Adding Suzanne - At the top in the header section, click Add, then Mesh, then Monkey. |
Step 3. Suzanne - You should see the monkey in the middle. |
Step 4. Adding the Smoke Effect - Click on the monkey object and it should be outlined in orange. In the header click Object, then Quick Effects, then Quick Smoke. |
Step 5. Smoke Applied - An orange box should appear around the monkey's head. That let's you know the smoke effect can be applied to the object. |
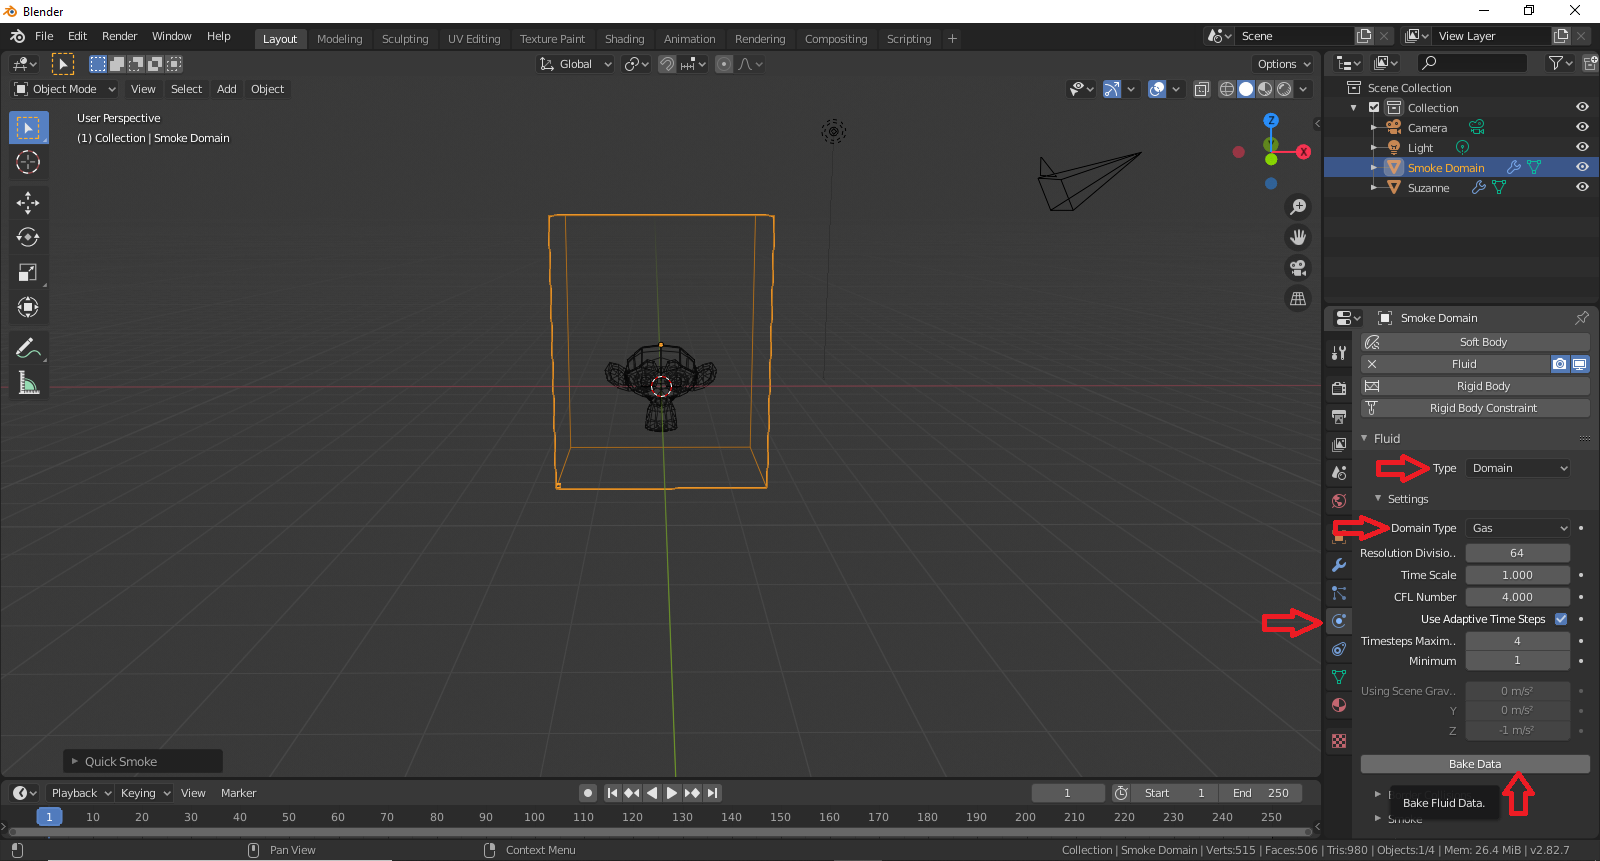 Step 6. Bake Fluid Data - Make sure the box around the monkey is selected and outlined orange, then on the bottom right in the sidebar click the small light blue sphere with a 3/4 line connected to... |
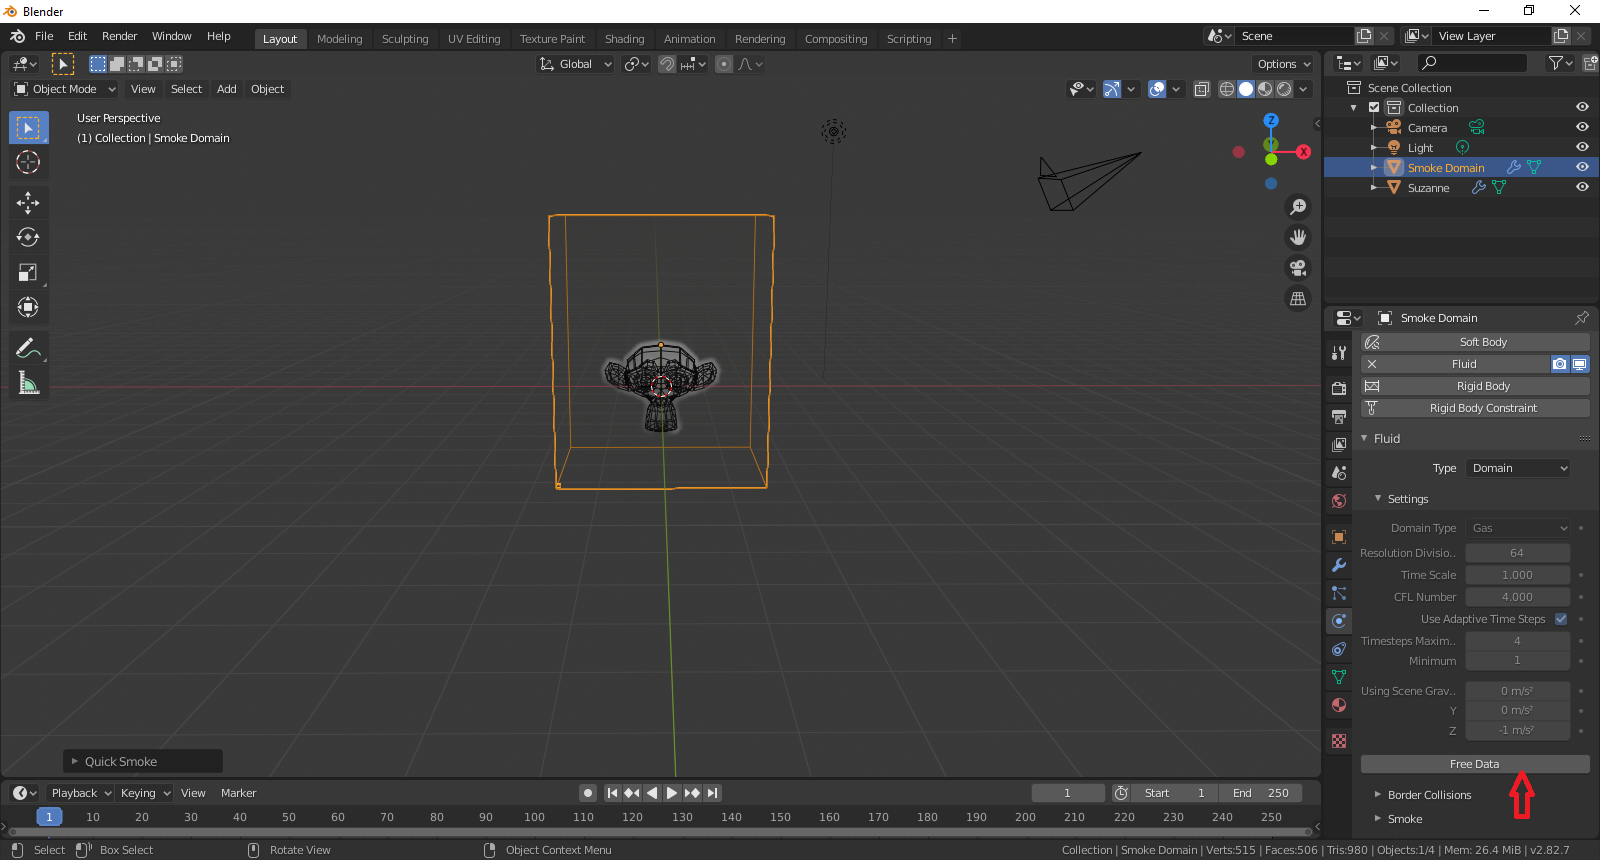 Step 7. Data Baked - If your data was baked correctly. Your "Bake Data" button, should now say free data. The smoke effect has been applied, and you should a grey fog around the monkey's head. Once... |
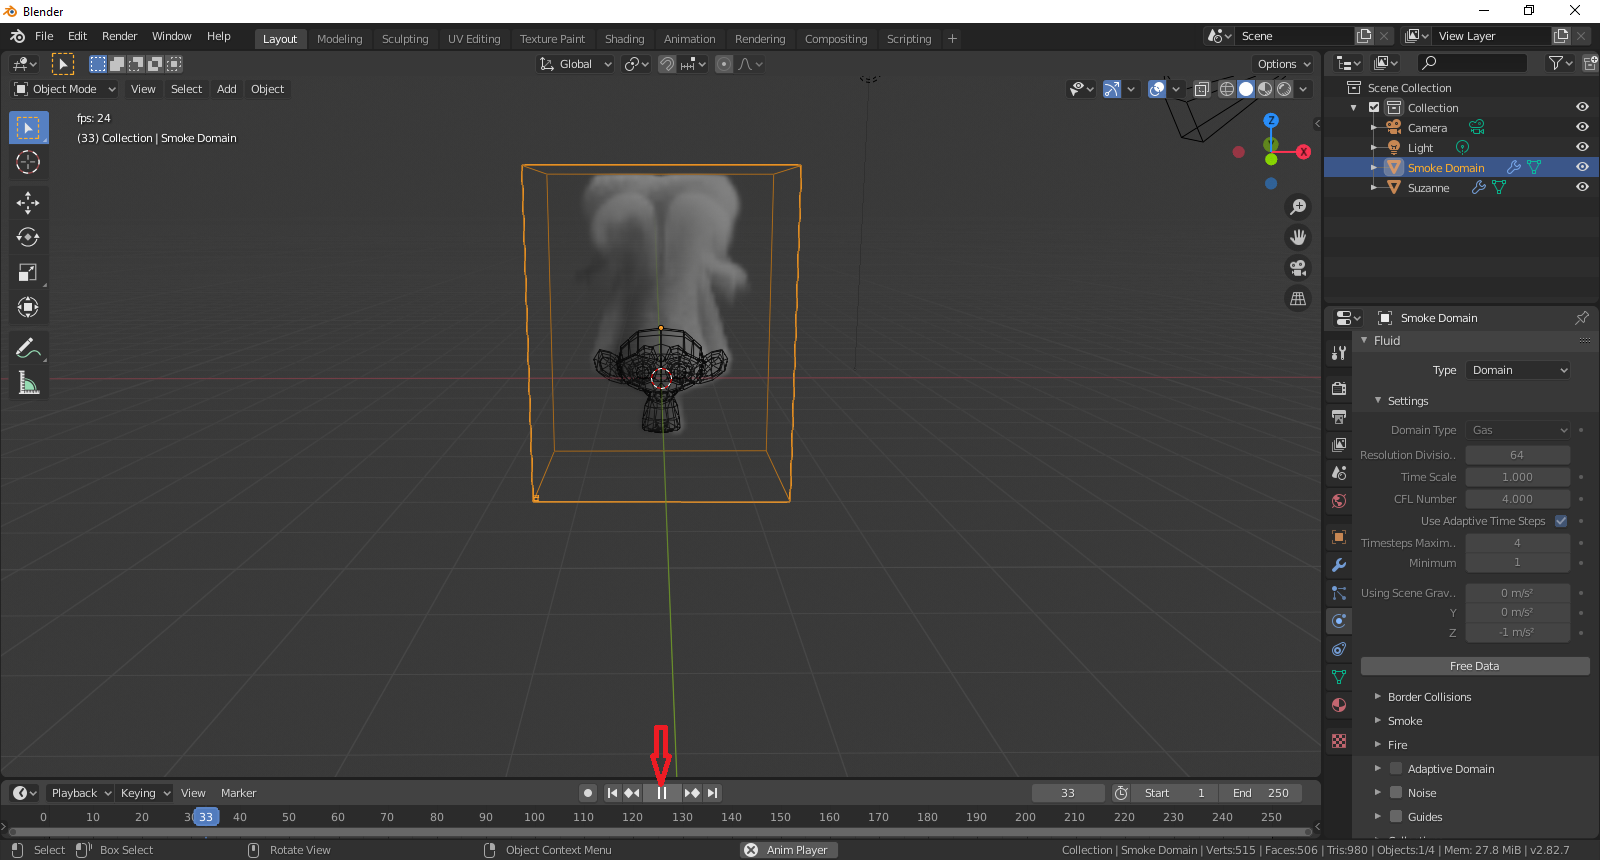 Step 8. Smoked Monkey's Head - Hit the space bar, or the play icon at the bottom middle of the playback tool bar, and watch the effect play. |
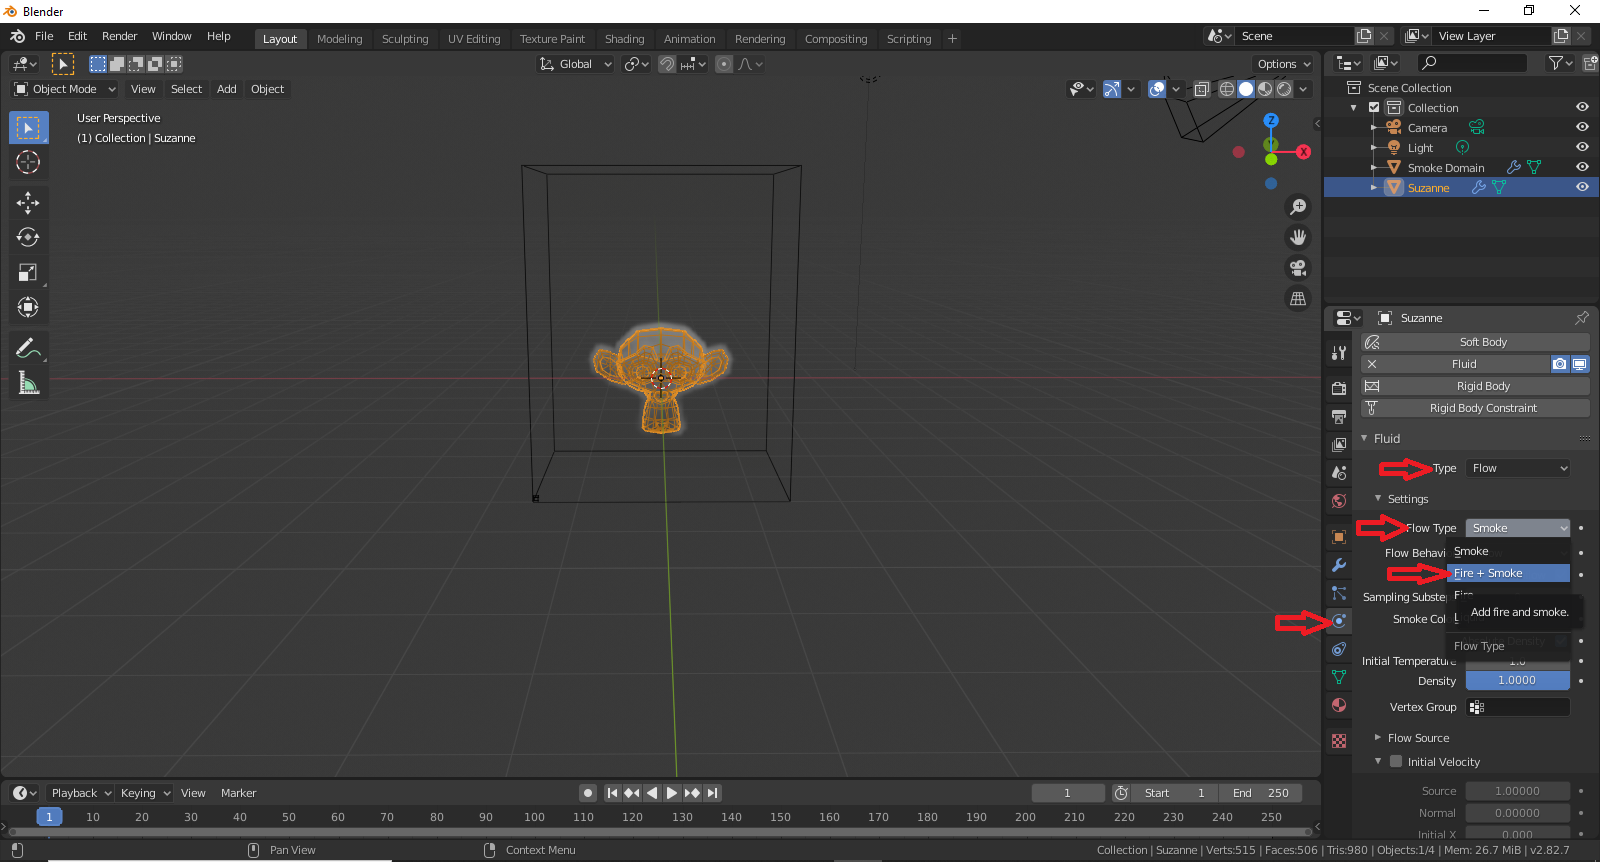 Step 9. Fire and Smoke - Make sure the monkey's head is selected and there is orange outline around the monkey, then on the bottom right in the sidebar click the small light blue sphere with a 3/4 ... |
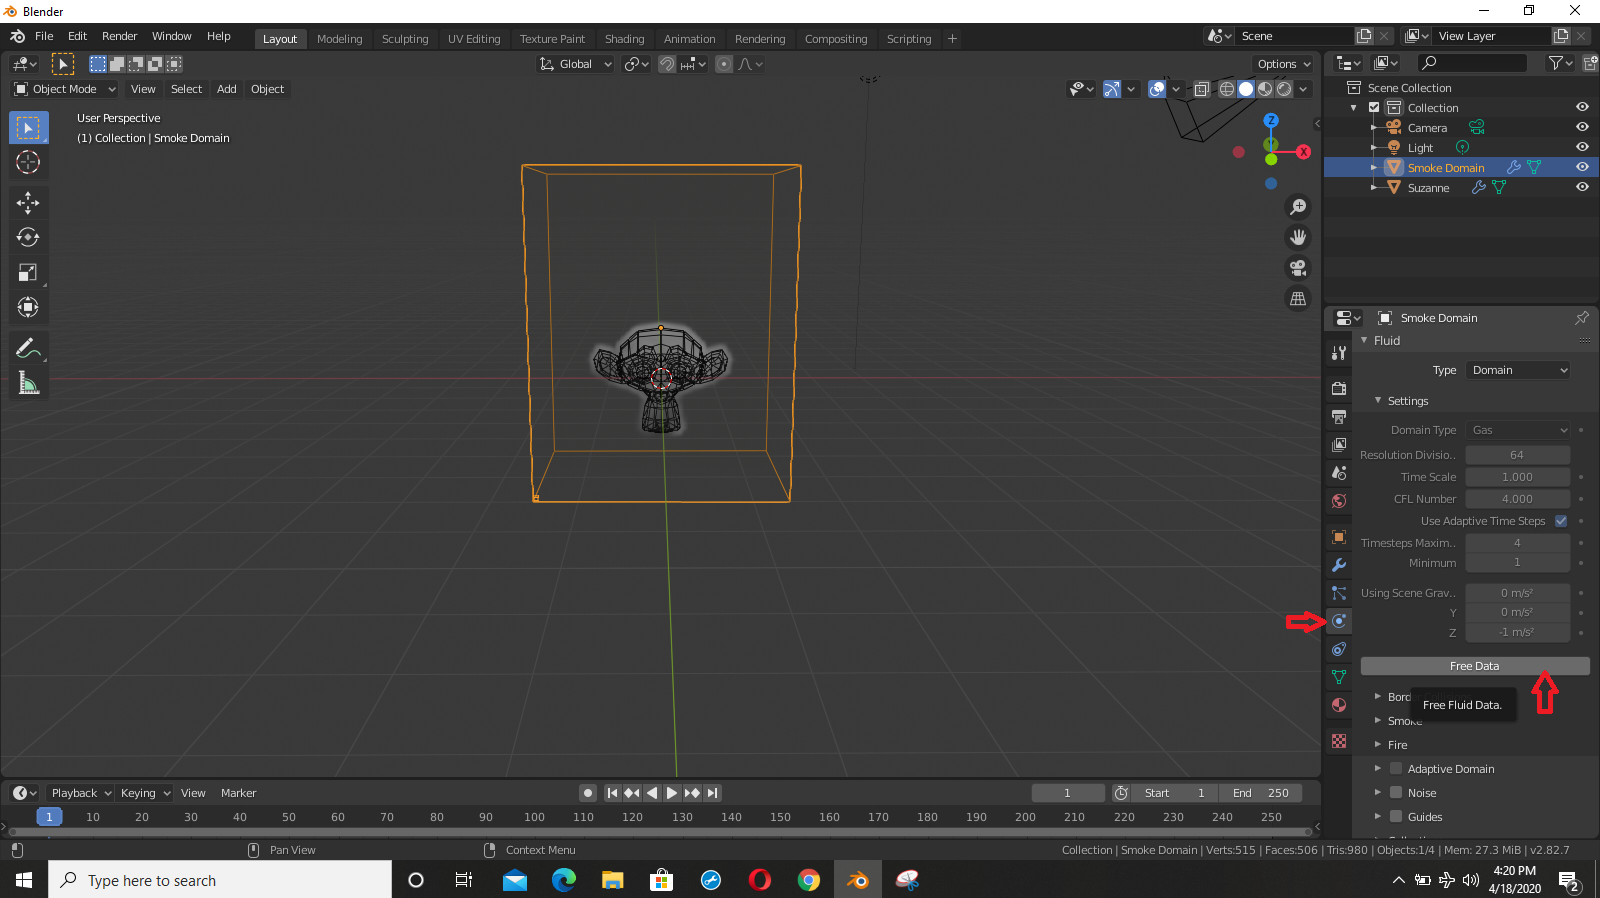 Step 10. Free Data - At this point the fire and smoke effect has not been applied, even though you changed the flow type for the Suzanne object. If you pressed play the smoke effect would still dis... |
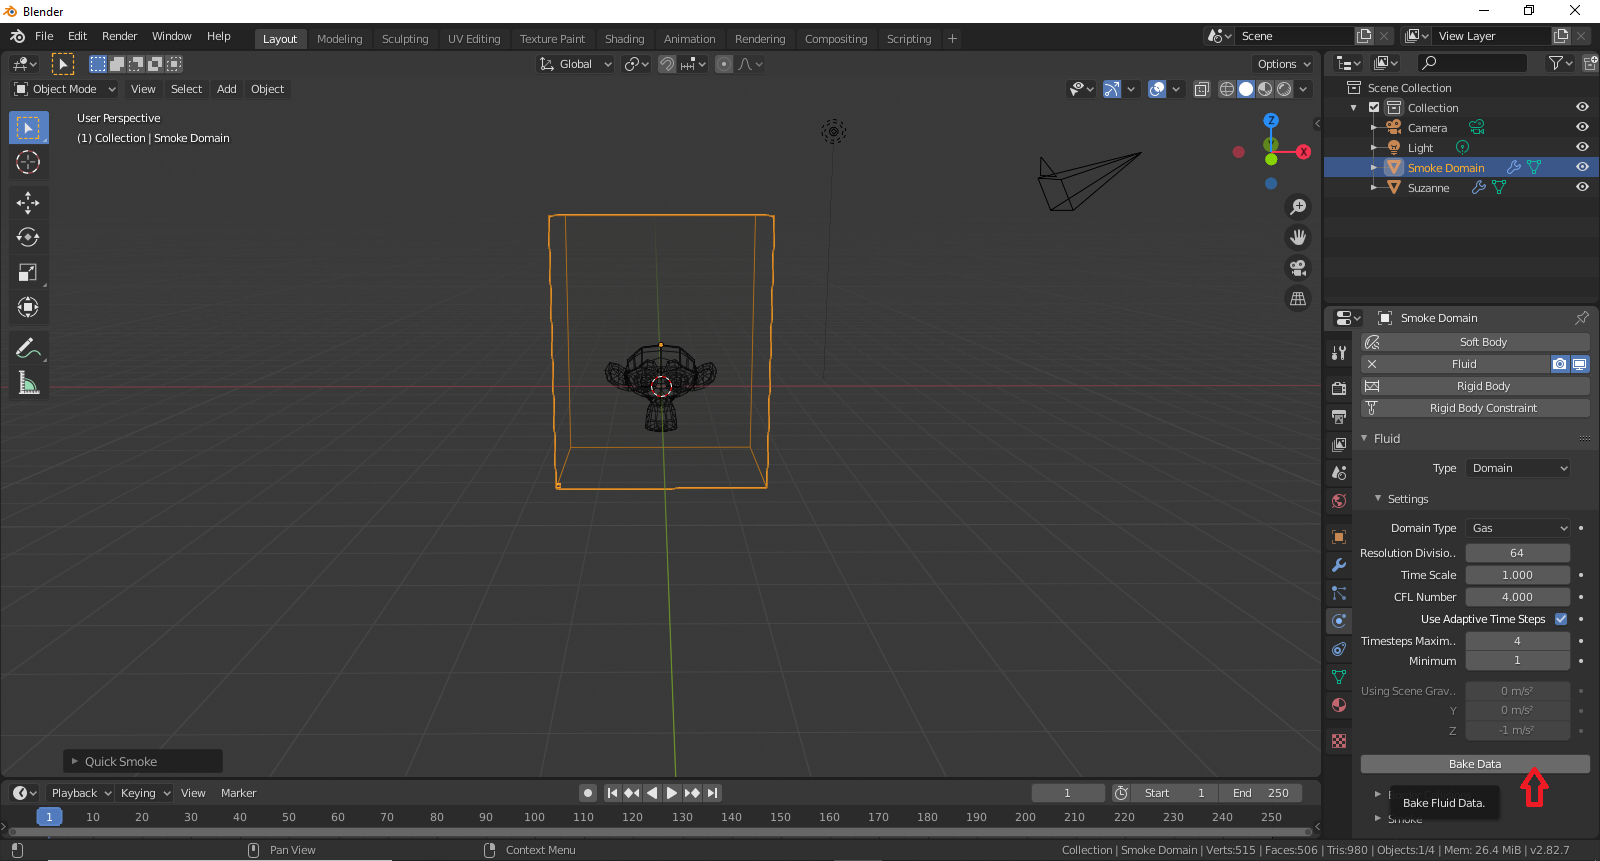 Step 11. Fire and Smoke Bake - The "Free Data" button should have turned back to "Bake Data". Once you click "Bake Data", fire and smoke will be the current effect. |
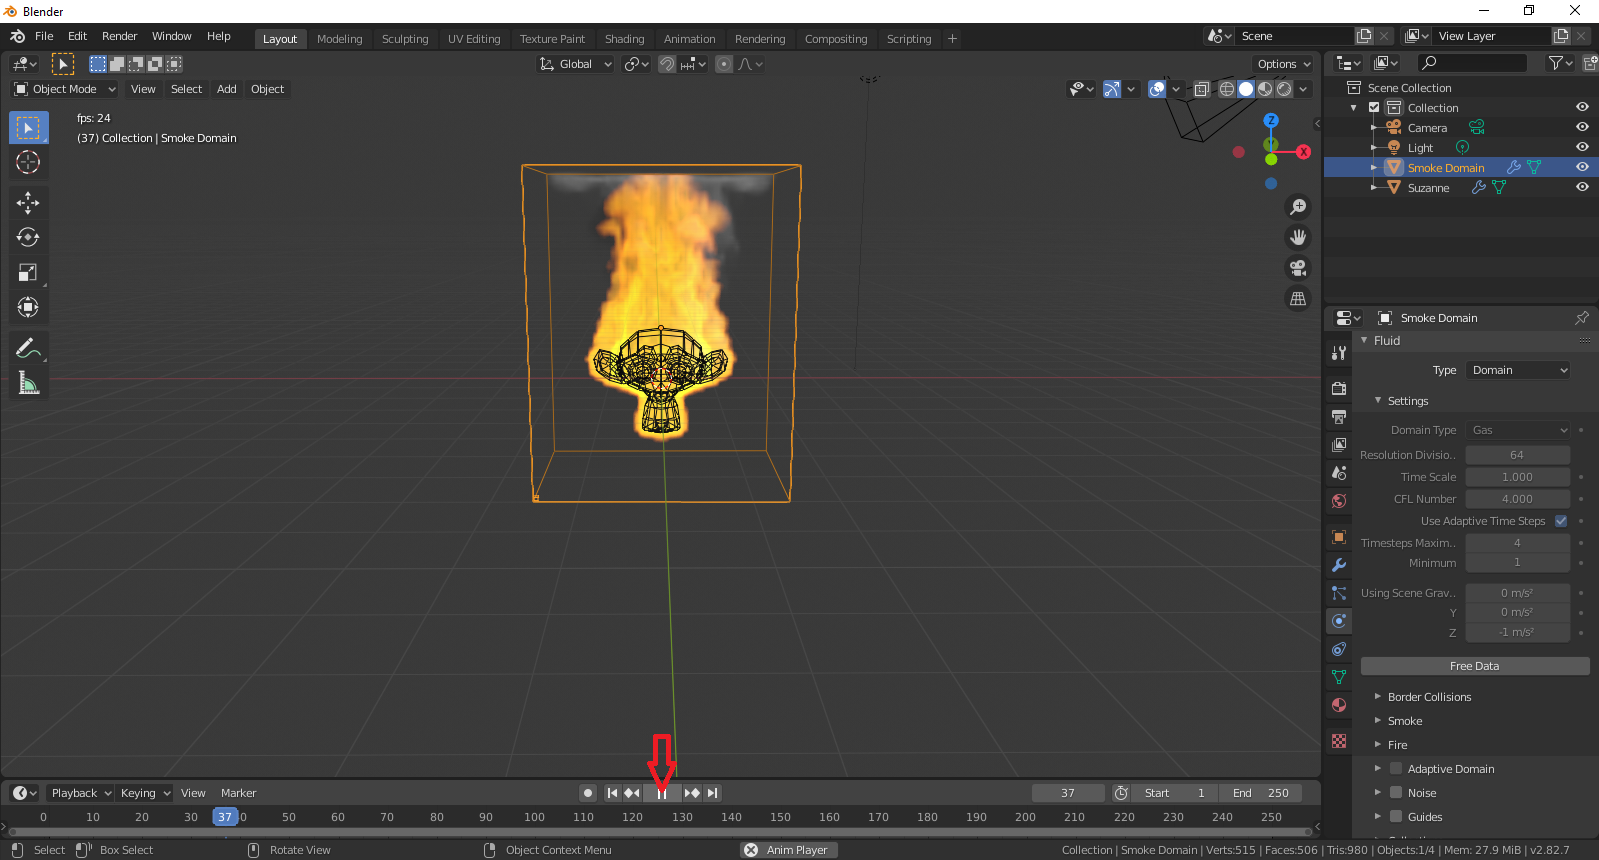 Step 12. Flaming Monkey's Head - After the "Bake Data" button turns back to "Free Data", Hit the space bar, or the play icon at the bottom middle of the playback tool bar, and watch the effect play... |



Comments